Quick Start: Ethernet Setup
The simplest way to get your GNSSDO(+) up and running is to connect it to your Ethernet network or an Ethernet port on your broadband router:
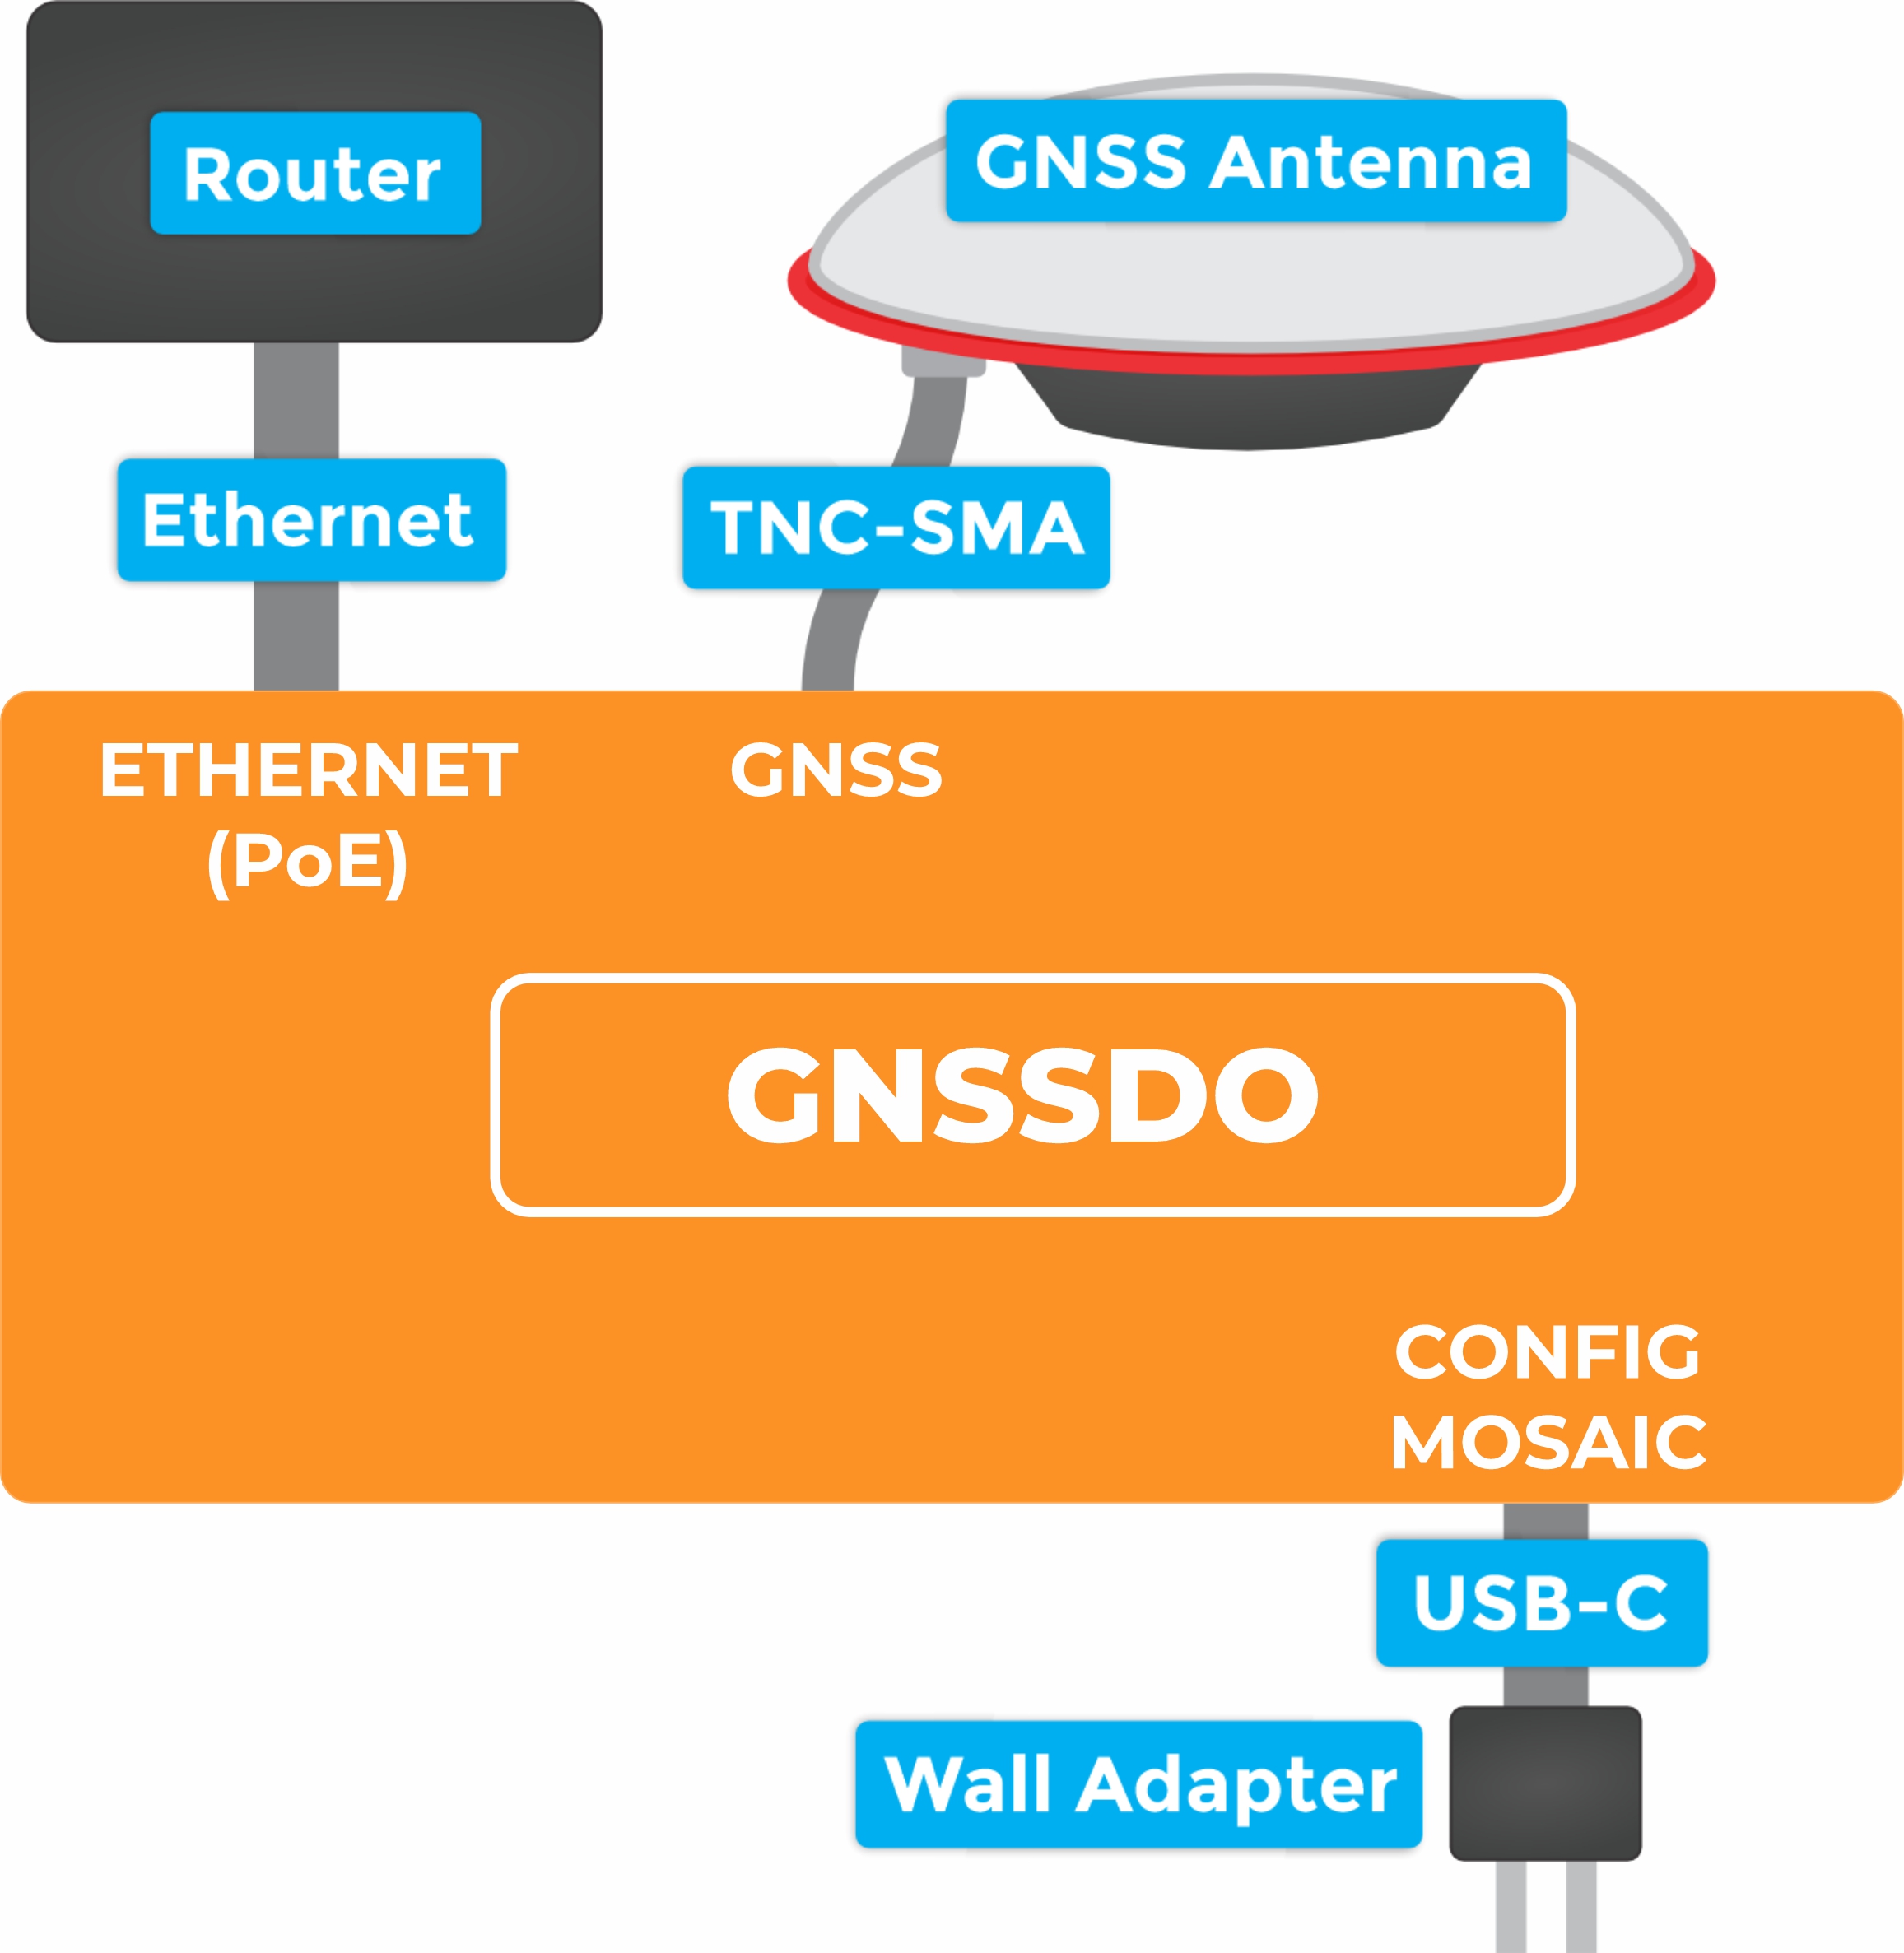
1 - Connect the GNSS antenna
- Inside your SparkPNT GNSSDO(+) kit, you will find the L1/L2/L5 GNSS "UFO" antenna. It has a TNC connection. Use the supplied TNC-SMA cable to connect the antenna to the
GNSSSMA connection on the GNSSDO(+). - The antenna needs a clear view of the sky. If you are working indoors, put the antenna outside and pass the cable through a window. (Insulating double-glazed windows have a coating which can block the GNSS signal.)
- Make sure the antenna is securely mounted to a structure so that it cannot be moved.
2 - Connect the GNSSDO(+) to your Ethernet network or router
- Use the supplied CAT-6 Ethernet cable to connect the
ETHERNET (PoE)port to your network or an Ethernet port on your router. - If your router provides Power-over-Ethernet (PoE), you're all set (skip the next step)!
- You should see the red
PWRLED light up and text start to appear on the OLED display.
- You should see the red
- If your router does not provide PoE, move on to step
3.
3 - Provide power
- You can power the GNSSDO(+) using the supplied USB power supply (wall adapter) and USB cable.
- Plug the power supply into the wall.
- Use the supplied USB-C cable to connect the power supply to either of the USB-C ports.
- You should see the red power
PWRLED light up and text appear on the OLED display.
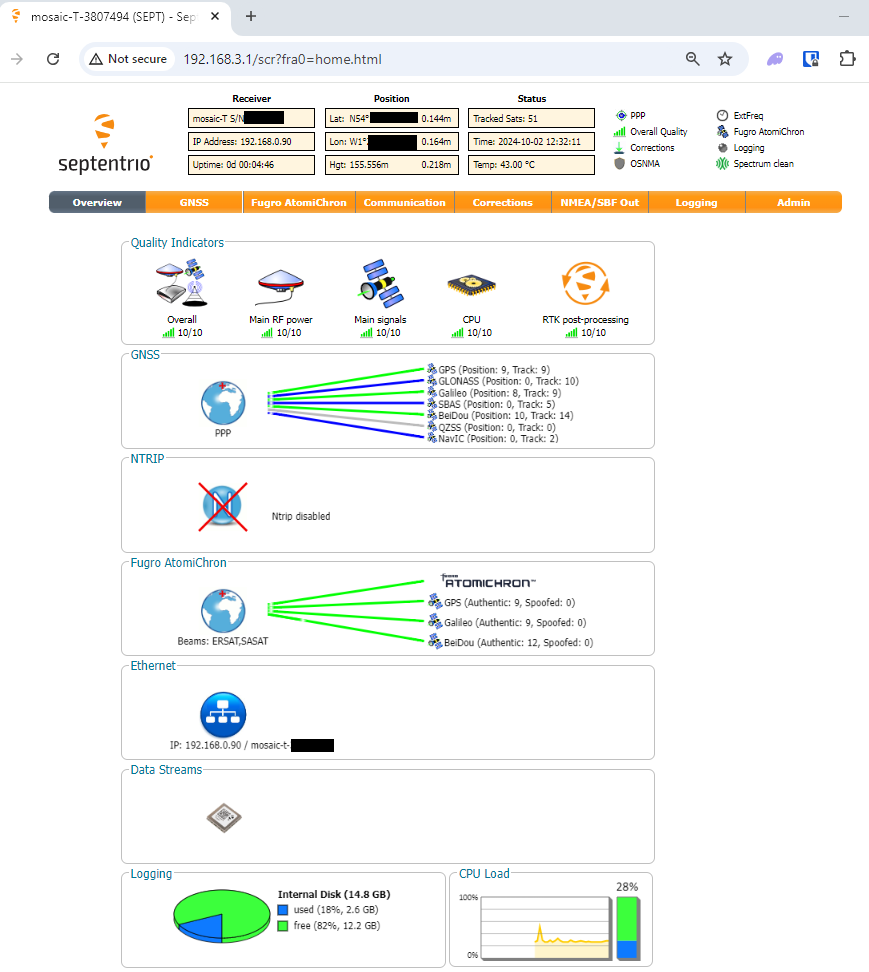
Once the mosaic-T has acquired a satellite signal and is connected to the Ethernet network, the OLED will display: the date and time; the antenna's position as Latitude (Lat) and Longitude (Long); the Ethernet IP (Internet Protocol) network address.
Connect your computer or mobile device to the same network that the GNSSDO(+) is on, open a web browser and navigate to the IP address shown on the OLED display. You should be able to access the mosaic-T module's internal web sever. Each web page displays a lot of helpful information and can also be used to fully configure the mosaic-T GNSS module.
The following sections will help if your GNSSDO(+) is not working as expected:
The red power PWR LED will light up when the GNSSDO(+) has power. If the PWR LED is off, make sure the wall adapter has power and the USB cable is connected.
If you use your own Ethernet cable for Power-over-Ethernet, check it has all eight pins connected. Some cables only have four pins connected and do not support Power-over-Ethernet.
The OLED display will only show position information (Lat, Long etc.) once a satellite signal has been acquired. If you don't see these on the display, check the SMA to TNC cable is connected correctly and that the antenna is outside with a clear view of the sky. Use a male-female SMA extension cable if needed to increase the cable length.
Check the Ethernet interface is enabled. It may be disabled. Connect via the CONFIG MOSAIC USB-C port and open 192.168.3.1 on a web browser. Check the Communication \ Ethernet sub-page.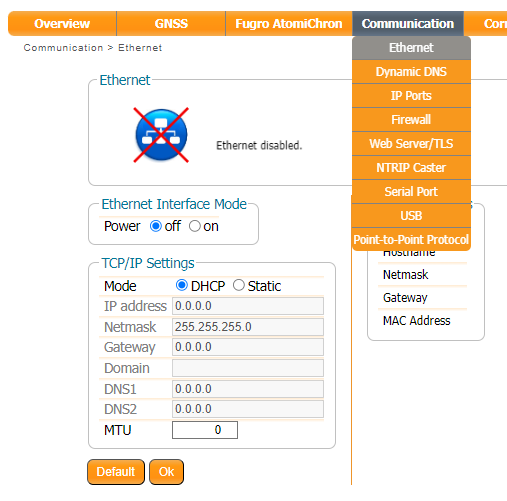
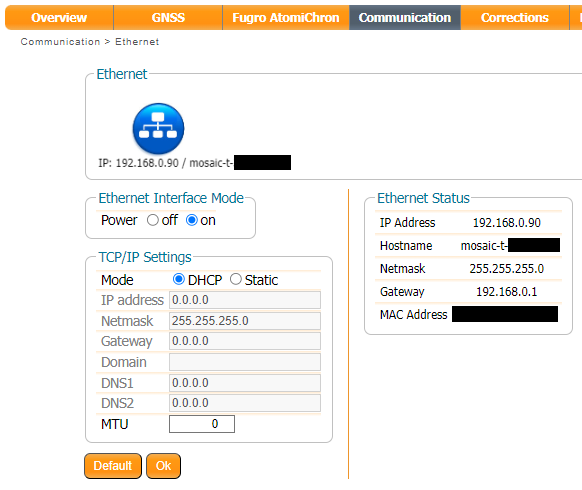
By default, the mosaic-T Ethernet port is configured for Dynamic Host Configuration Protocol (DHCP). It expects the router / Ethernet switch to provide it with an IP address. If the IP address is all zeros (0.0.0.0), check that your router has DHCP enabled. Most do.
If you need a static IP address, you can configure this through the mosaic-T's Communication \ Ethernet sub-page.
Subnet 3 is reserved for the mosaic-T's USB-C connection (Ethernet-over-USB). If your router / switch is allocating addresses using subnet 3 (192.168.3.***), please change its settings so it uses a different subnet.
If you can not see the mosaic-T's internal web page, please check that your computer / tablet / phone is connected to the same network. Most broadband routers support both Ethernet and WiFi simultaneously using the same subnet. If you are using a phone, check it is connected to the router WiFi - and not using its mobile data connection.
Subnet 3 is reserved for the mosaic-T's USB-C connection (Ethernet-over-USB). If your router / switch is allocating addresses using subnet 3 (192.168.3.***), please change its settings so it uses a different subnet. If it is using subnet 3, both the mosaic-T and your device will appear to have valid IP addresses but will not be able to communicate.