Mining with Onocoy
Some RTK networks, such as Onocoy, offer users incentives for operating a reference station and contributing RTK corrections to their network. These incentives are often tied to a form of cryptocurrency, which is rewarded based upon a performance scale after the data is validated.
This section is for educational purposes only!
This section doesn't contain nor should it be represented as an endorsement of any of the projects mentioned nor as financial advice. Don’t invest anything you aren’t willing to lose.
Onocoy Documentation
Onocoy provides users with documentation for mining rewards with an RTK reference station. To get started, users will need to have installed and mounted the hardware of their SXM-E and created a user account with Onocoy. Then, users can obtain NTRIP server credentials from their account, to connect their reference station to the Onocoy network.
Device Configuration
In order to connect their SXM-E to the Onocoy network, users will need to adjust the configurations of the mosaic-X5 and setup an NTRIP server to the Onocoy network.
Enable L5 Band Reception
Before setting up the SXM-E as an NTRIP server, users will need to enable the GPS L5 frequency band in order to provide corrections for it. These steps, are documented in the Enabling GNSS Signals section of this tutorial:
Below, are instructions to enable the SXM-E to receive GNSS signals from the GPS L5 frequency band.
Currently, the GPS-L5 service is pre-operational and marked as "unhealthy"; therefore, extra configuration steps are required to enable this frequency band.
From the Admin tab, click on Expert Control from the drop-down menu. Then, navigate through the Control Panel > Navigation > Receiver Operation > Masks menus to find the Discard unhealthy satellites setting. Set both the Tracking and PVT options to off, from their drop-down menus.
Through the web interface, users will need to access the advanced settings of the configuration menu by clicking on the Expert Control option from the Admin tab's drop-down menu. Then, navigate through the Control Panel > Navigation > Advance User Settings menus:
> Tracking > Signal Tracking : Enable GPSL5 signal tracking

> PVT > Signal Usage - Enable GPSL5 in both the PVT and navigation data decoder sections
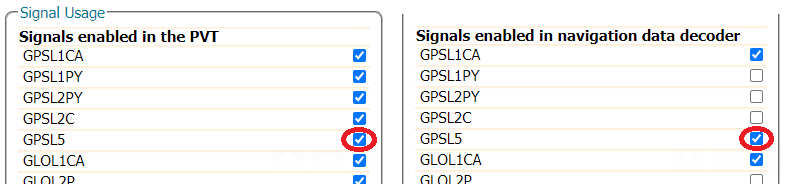
Make sure to click the OK button at the bottom of each page, where you are making changes to update the current configuration. Also, don’t forget to save it to boot, if you want the configuration to persist when you cycle power.
Connect to the Onocoy Network
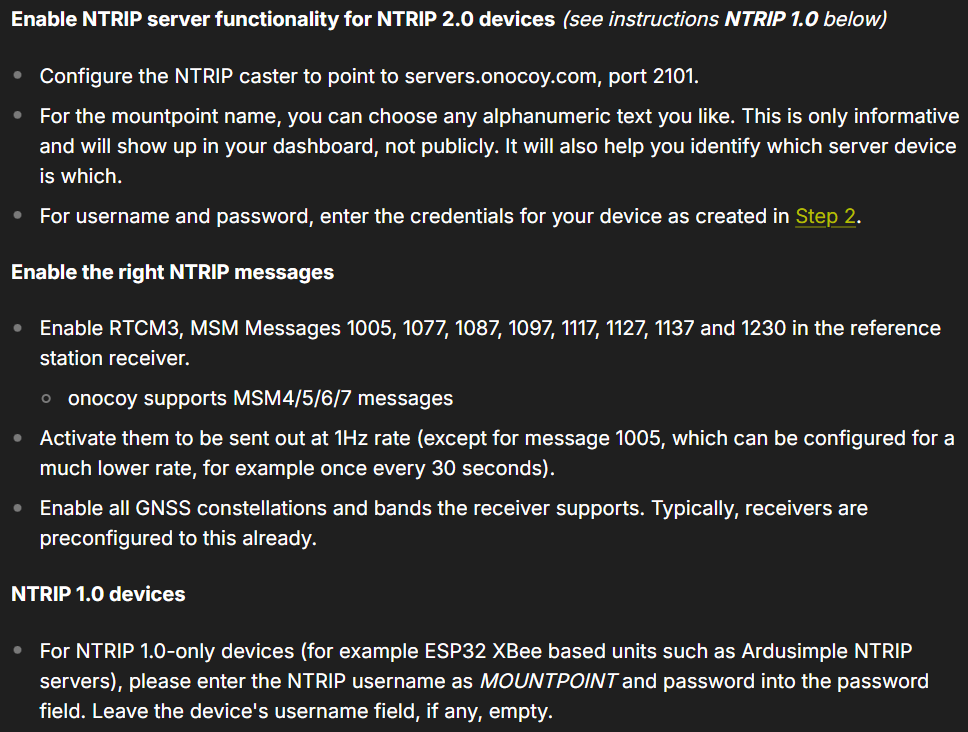
In order to connect the SXM-E to the Onocoy network, users will need to set up an NTRIP caster in the mosaic-X5 configuration settings. In order to receive the rewards, Onocoy expects a specific set of configurations as listed in their online documentation.
Most of steps for these requirements, are documented in the Output RTK Corrections section of this tutorial:
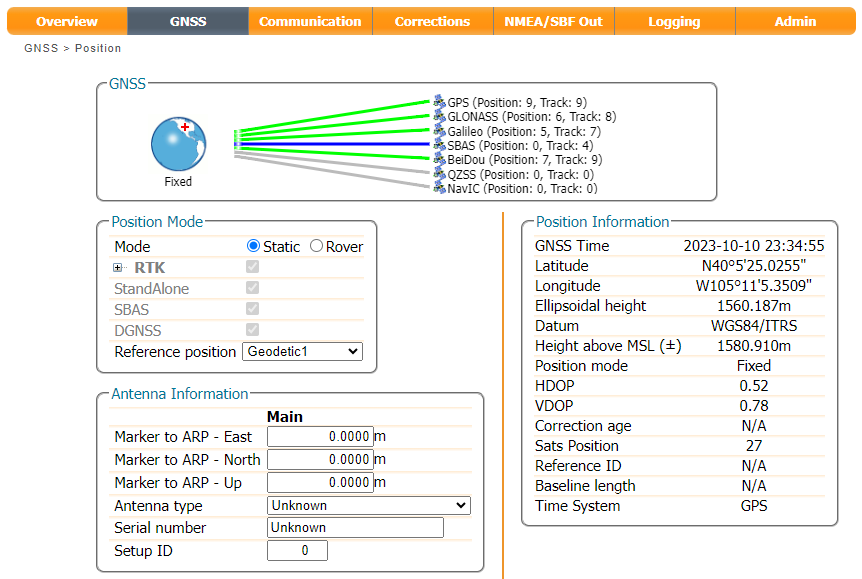
Check that the Position Mode is set to Static, using either the precise position from your RINEX post-process data or an automatic Reference Position.
In the Corrections tab, select New NTRIP server:
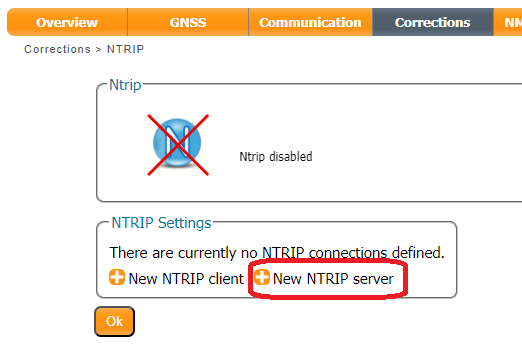
Ignore - Step from Original Instructions
Ignore this step, documented in the Output RTK Corrections section:
Enter the details from the confirmation email:
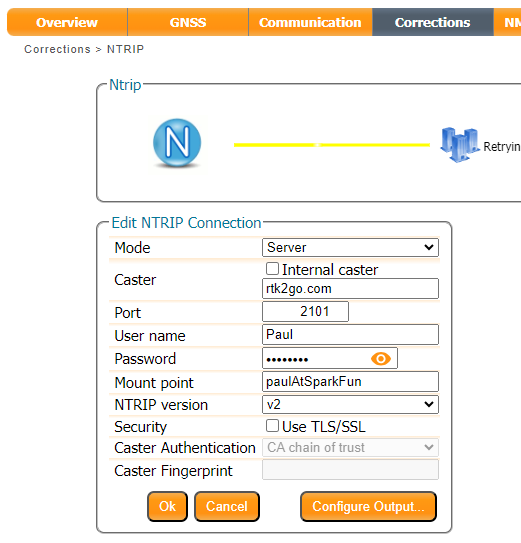
Instead of the confirmation email, use the information provided in the Onocoy documentation:
- Configure the NTRIP caster to point to
servers.onocoy.com, port2101.- For the
mountpointname, you can choose any alphanumeric text you like. This is only informative and will show up in your dashboard, not publicly. It will also help you identify which server device is which.- For
usernameandpassword, enter the credentials for your device as created in Step 2.
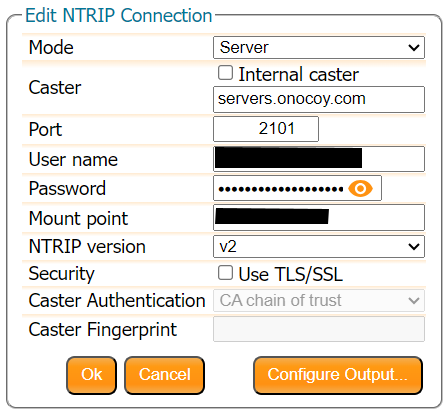
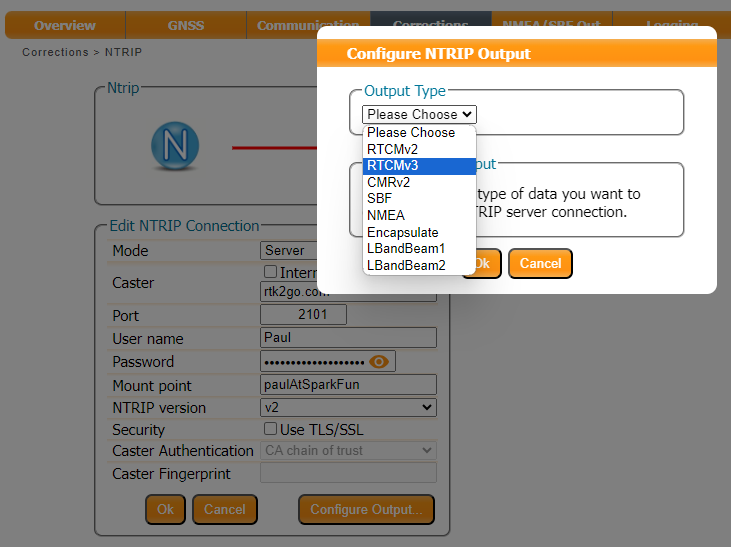
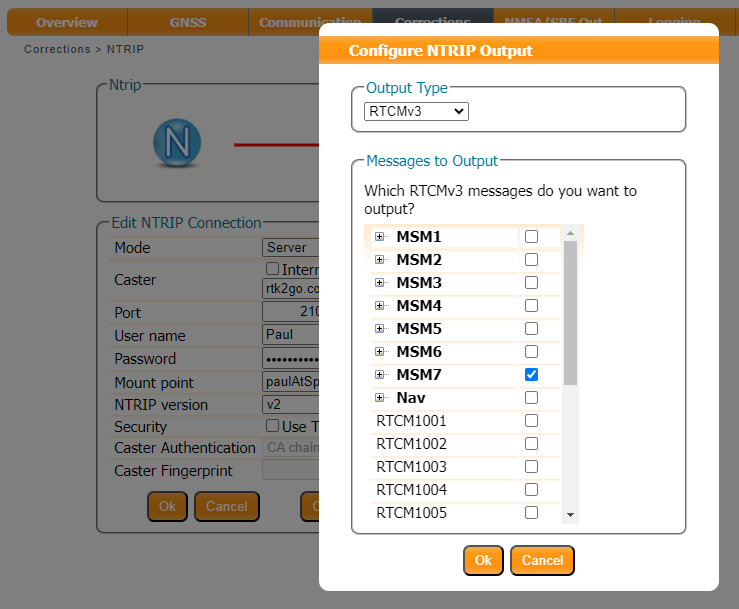
Then use the Configure Output button to select the RTCM Output Type and which RTCM messages to send. Here we select RTCMv3. The mosaic-X5 supports both RTCMv2 and RTCMv3, but v3 has better data compression and message integrity so we will use that.
Ignore - Step from Original Instructions
Ignore this step, documented in the Output RTK Corrections section:
We also need to select which type of RTCM message to send. Here we select MSM7 since these are the longest highest precision messages. The message length does not matter since we are using Ethernet and WiFi, but it could be important if we were using Serial (UART) or LoRa to carry the correction messages.
Instead, select the RTCM messages listed in the Onocoy documentation. Below, are the RTCM messages we selected:
- Enable RTCM3, MSM Messages
1005,1077,1087,1097,1117,1127,1137, and1230in the reference station receiver.- onocoy supports MSM4/5/6/7 messages
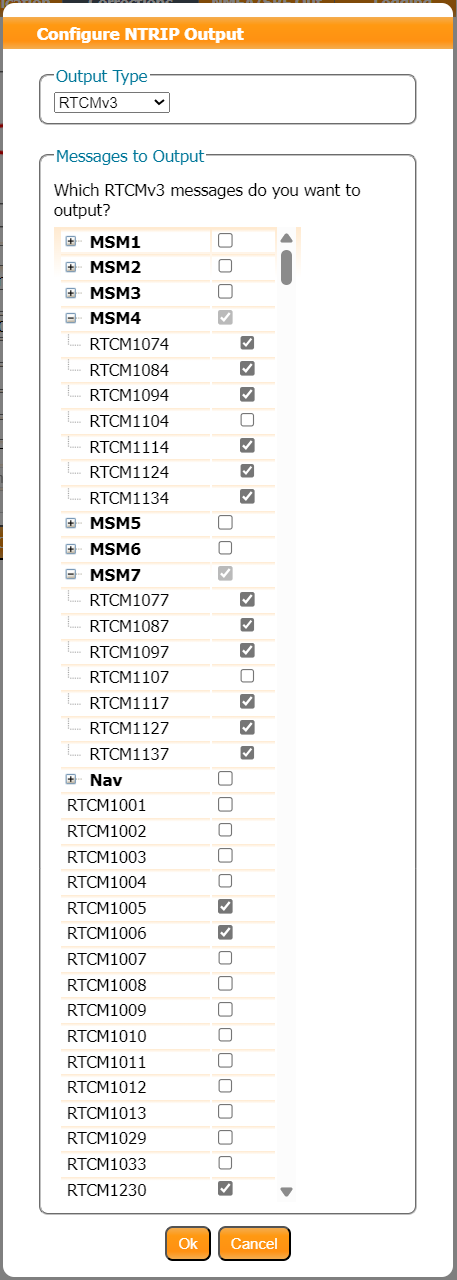
Remember to click the OK button at the bottom of the page, after making changes to update the current configuration. Also, don’t forget to save it to boot, if you want the configuration to persist when you cycle power.
Enable L5 Corrections
The last step in configuring the NTRIP server, users will need to enable the GPS L5 signal to be included in the MSM output messages. This will allow the SXM-E to provide RTK corrections for the GPS L5 frequency band. These steps, are documented in the Output L5 Corrections section of this tutorial:
Below, are instructions for outputting RTK corrections for the GPS L5 frequency band, from the SXM-E.
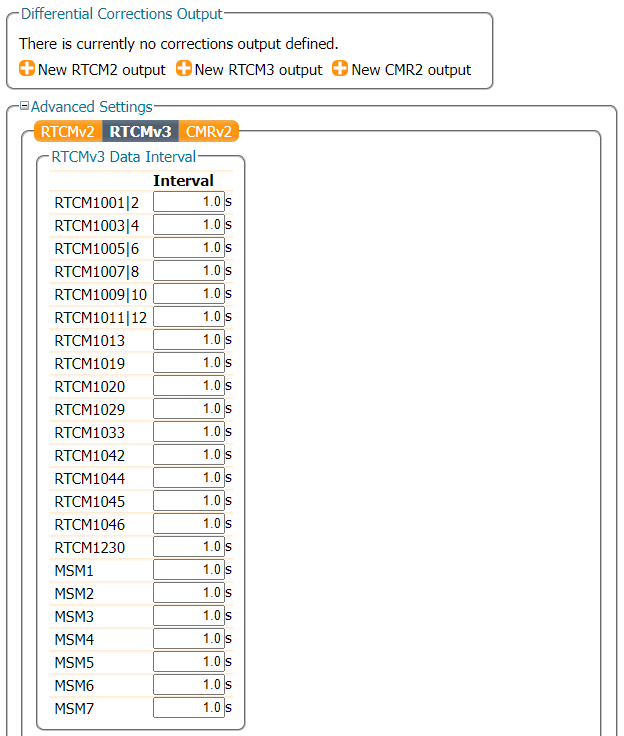
From the drop-down menu of the Corrections tab of the web interface, select Corrections > Corrections Output to bring up the corrections output settings. On this page, locate the Advanced Settings menu, where users can define the data intervals and formatting. Clicking on this will prompt a security dialog box to pop up, click the Proceed button to make changes to these settings. RTK corrections for the GPS L5 frequency band are only available in the RTCMv3 messages; therefore, users will need to select the RTCMv3 tab.
Scroll down to the RTCMv3 Data Formatting section, select the box next to the GPSL5 to enable the RTK corrections for the GPS L5 frequency band. In the example below, we have enable all the available signals to be included in the MSM output messages.
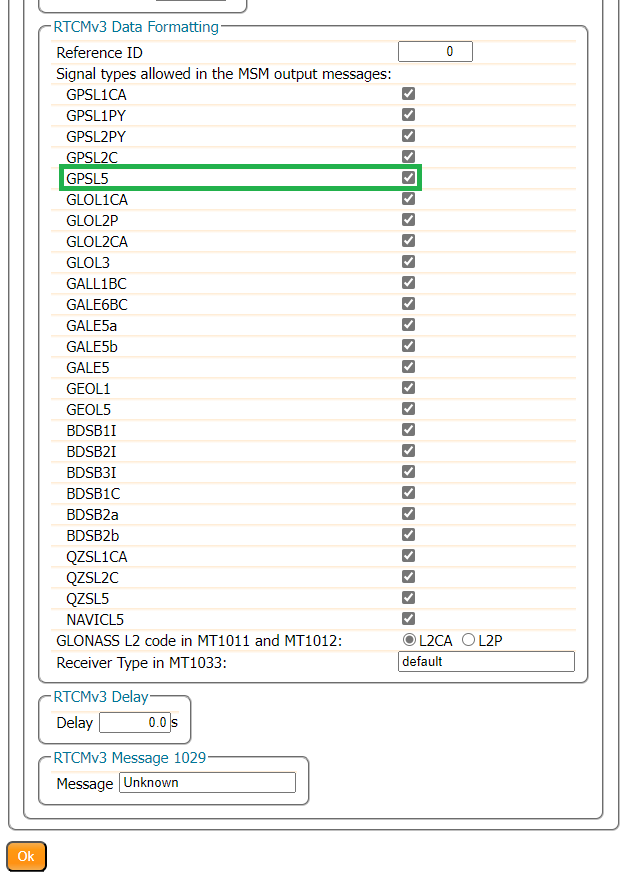
Make sure to click the OK button at the bottom of each page, where you are making changes to update the current configuration. Also, don’t forget to save it to boot, if you want the configuration to persist when you cycle power.
Receive Rewards
Once users have connected the SXM-E as an NTRIP server on the Onocoy network, there are a few additional steps in that need to be completed, a specified in their online documentation.
Happy Mining!