Configuration Settings
Users can only select, create/rename, or configure the settings of one profile at a time. Users cannot perform more than one of these tasks or perform these tasks on multiple profiles.
- A profile can be created or renamed
- Select a different profile
- Configure the settings of a selected profile
- Reset the selected profile to its default configuration
- Once a one of these tasks (listed above) has been performed for a single profile. If a configuration setting has been changed, users must save the settings and reload the webpage.
- Users must click the
Save Configurationbutton. - Once the
Success : All Savedmessage appears, the webpage needs to be reloaded.
- Users must click the
- Refresh the webpage to load the selected profile or saved configuration settings.
- Alternatively, users can also reset the device by clicking the
Exit and Resetbutton.
- Alternatively, users can also reset the device by clicking the
- Only after the webpage reloaded (the device has been reset), should users proceed with another of the tasks listed above.
Profiles
From the rtk.local configuration webpage, open the Profile Configuration drop-down menu. Users can store up to eight profiles, with user-specified names. This is handy for saving multiple device configurations for various tasks and/or end-users.

Profile Configuration menu.Create or Rename Profile
Select a bullet, then enter a new name in the Profile Name: text box.
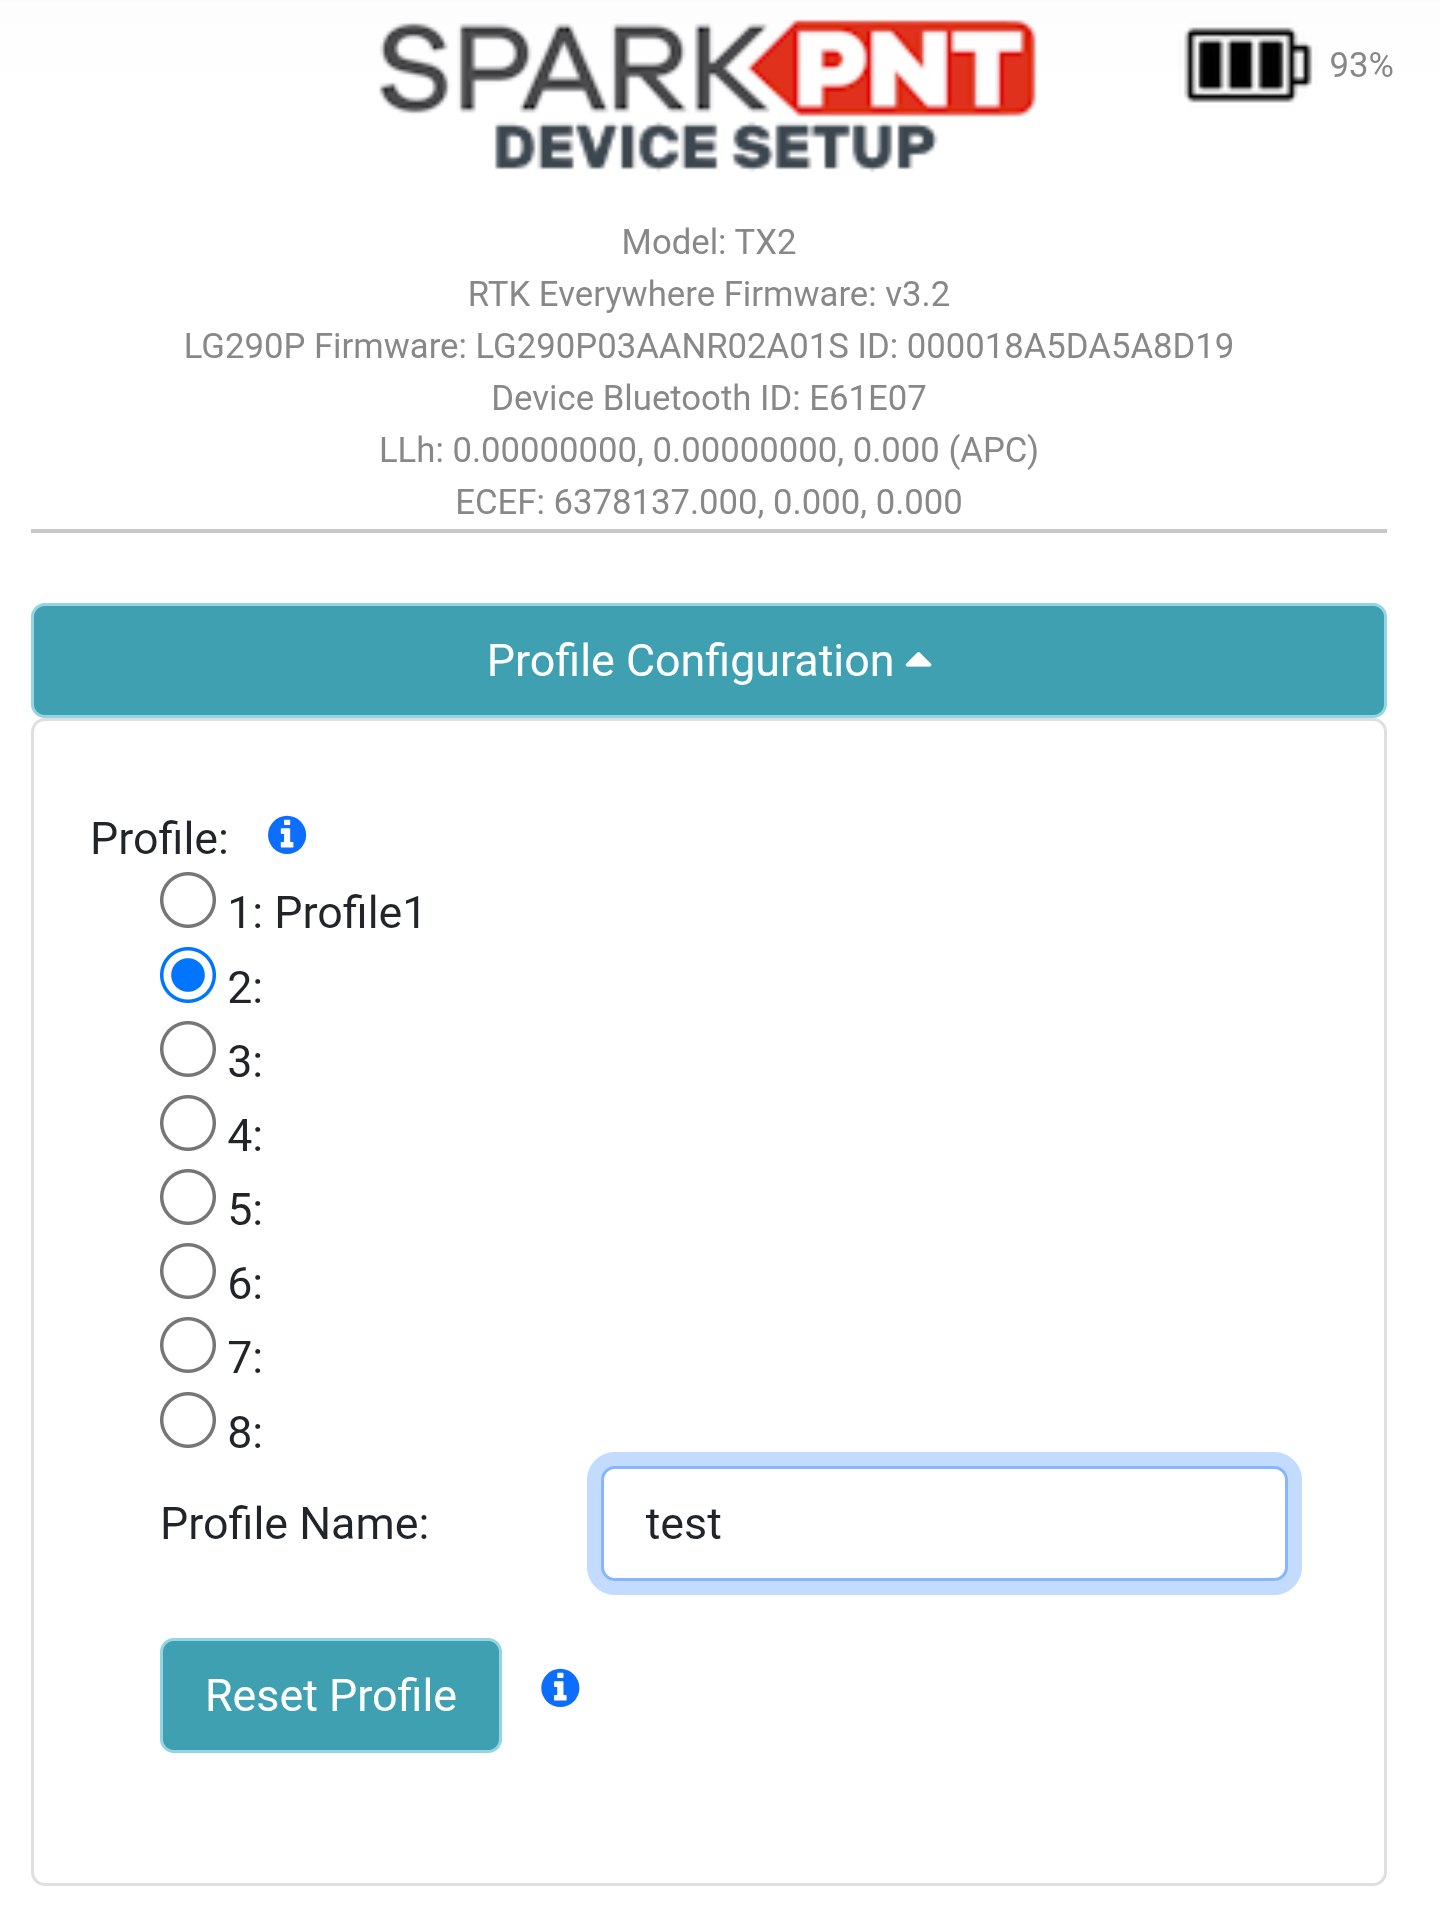
test.Scroll to the bottom of the configuration webpage and click the Save Configuration button. Once the Success : All Saved message appears, reload the webpage to update the configuration settings. With the webpage refreshed, open the Profile Configuration menu; the second profile should be selected and named test.
Configure a Profile
Changing the settings of a profile is relatively straight forward, once the profile has been loaded properly on the webpage.
- Select the bullet of the profile you'd like to configure.
- Under the
Profile Name:section of the menu, aLoading. Please wait...message will appear.
- Under the
- Give the device ~10 seconds to load the profile, then refresh the webpage.
- Open the
Profile Configurationmenu to verify that the proper profile is selected.tip- If the selected profile hasn't loaded the device may need more time to load all the setting. Give it a minute before refreshing the webpage.
- If the selected profile still hasn't loaded, users may need to manually reset the device and starting over.
- Once users have verified that the profile has loaded properly, scroll down to change any of its configuration settings.
After the desired settings have been changed, scroll to the bottom of the configuration webpage and click the Save Configuration button. Once the Success : All Saved message appears, reload the webpage to update the configuration settings for the selected profile.
Reset a Profile
Users can reset a profile to the device's factory settings. Select the profile from the menu, then click on the Reset Profile button.

A Resetting profile. message will appear briefly. Once it has vanished, scroll to the bottom of the configuration webpage and click the Save Configuration button. Once the Success : All Saved message appears, reload the webpage to update the configuration settings.
The selected profile should appear blank, without a name. If the profile appears with the name 123456798..., wait ~5 seconds and reload the webpage again.
GNSS and Rover Settings
From the rtk.local configuration webpage, open the GNSS Configuration drop-down menu. Here, users can change the settings for the GNSS receiver and the settings for operating as a rover; including, but not limited to the GNSS constellations utilized, the GNSS messages and solution data rates, elevation masks, the signal to noise ratio mask (C/N0), PPP services and settings, and/or NTRIP client and settings.
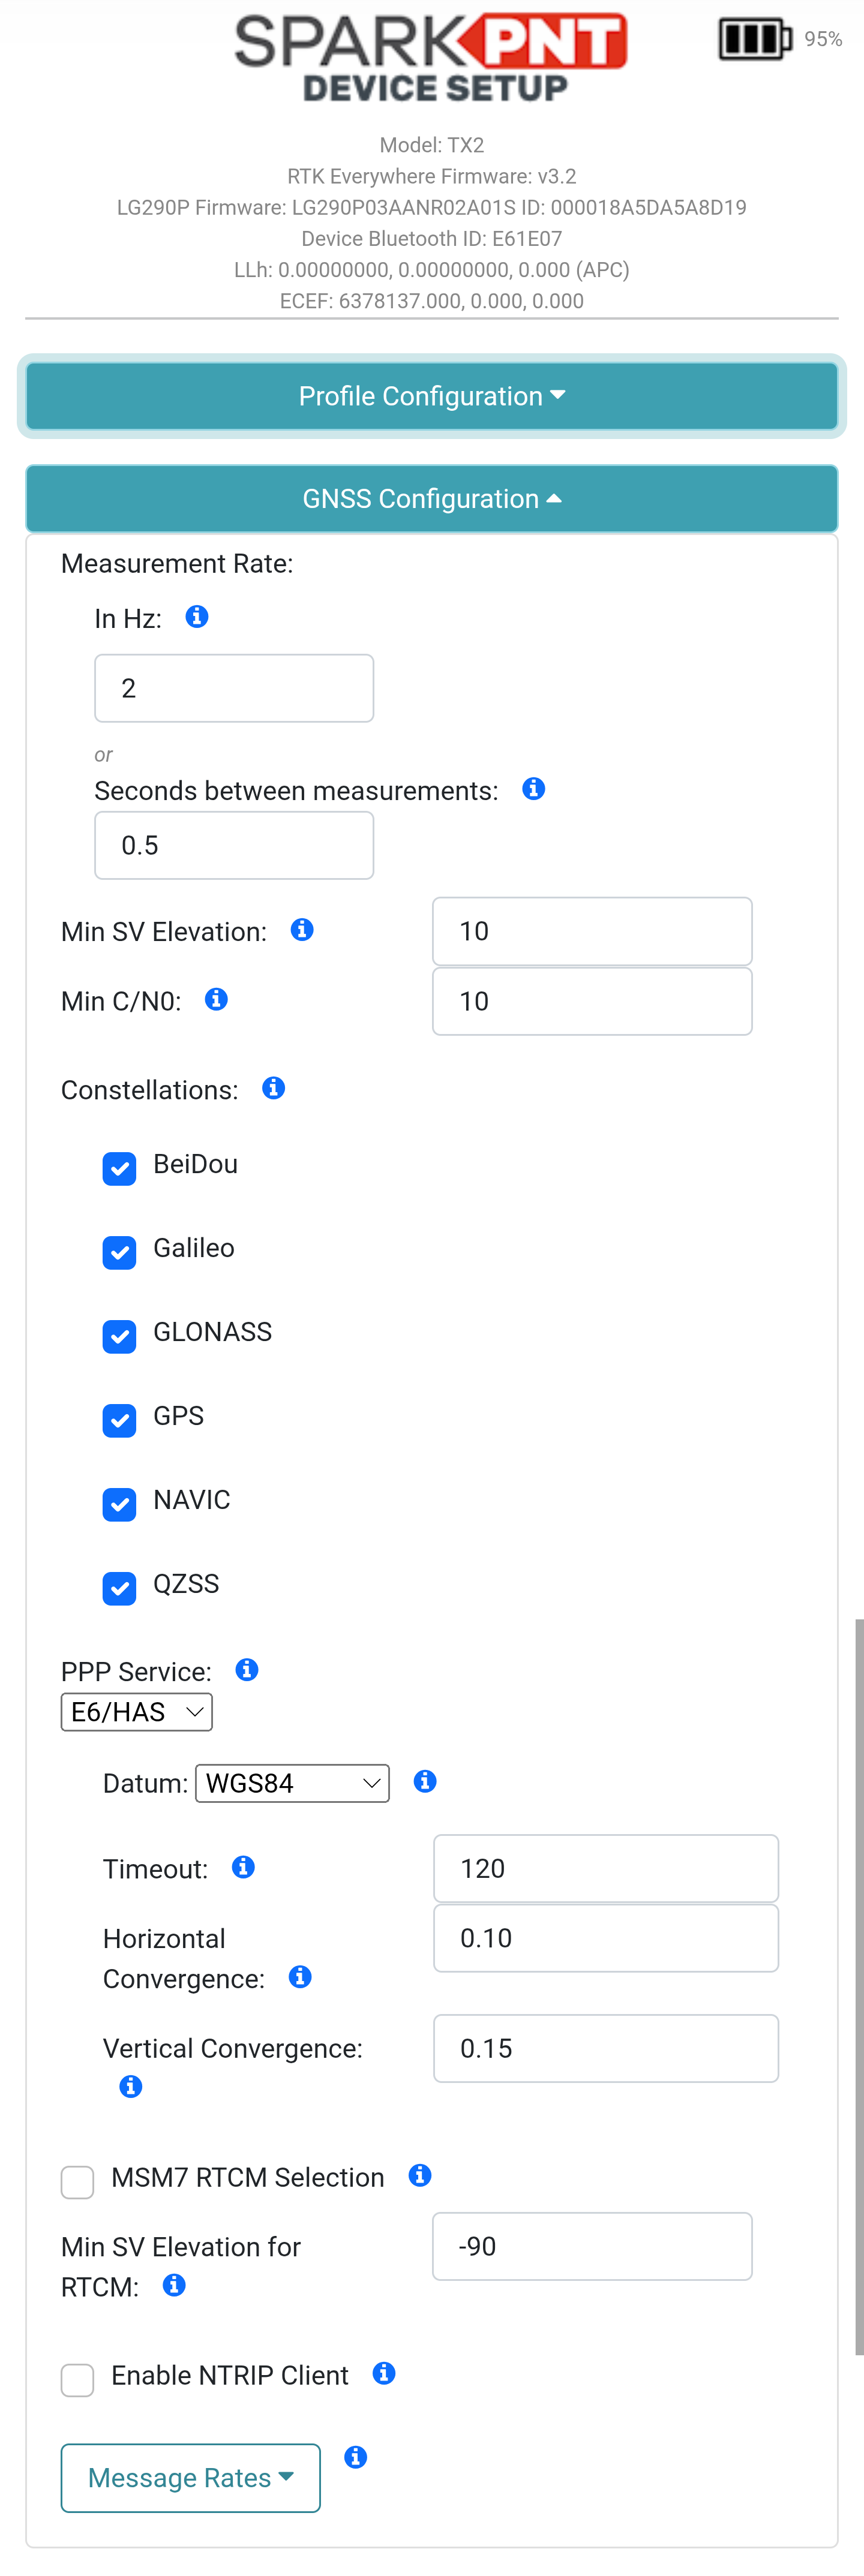
GNSS Configuration menu.After the desired settings have been changed, scroll to the bottom of the configuration webpage and click the Save Configuration button. Once the Success : All Saved message appears, reload the webpage to update the configuration settings.
Base Station
From the rtk.local configuration webpage, open the Base Configuration drop-down menu. Here, users can configure the settings for operating as a base station. Additionally, users can enable the device to function as an NTRIP server and and configure the RTCM messages for RTK corrections.

Base Configuration menu.The base station's location can be provided with two methods, which affect the absolute-accuracy of its RTK corrections:
- Fixed: Users can provide a fixed position for the base station's location in [ECEF] or [geodetic] coordinates. This is used to provide RTK corrections to rovers, for the most accurate surveying results in relation to fixed coordinates on the planet Earth.
- For example, surveying property lines, locating or installing utilities, or other applications where the accuracy of measured positions must be repeatable.
- Survey-In: The base station configures its location, based on an average of measurements made over a specified time frame. This is used to provide RTK corrections where the absolute-accuracy of a rover's position isn't necessary and relative-accuracy of its measurements are sufficient.
- For example, aerial surveys, mapping trails and campsites, or drafting construction plans where the accuracy of measurements in relation to one another (i.e. relative-accuracy) is important. However, the location of those positions, in relation the planet Earth (i.e. absolute-accuracy) is irrelevant.
infoAny errors in the base station's location, are propagated directly into the rover through the RTK corrections. Therefore, if the base station is off by 2m in a specific direction; all the RTK measurements from a rover, using that base station, will also be off by 2m in the exact same direction.
After the desired settings have been changed, scroll to the bottom of the configuration webpage and click the Save Configuration button. Once the Success : All Saved message appears, reload the webpage to update the configuration settings.
Point Perfect Service
From the rtk.local configuration webpage, open the Point Perfect Configuration drop-down menu. If users have an active subscription, they can enable their Point Perfect service here.
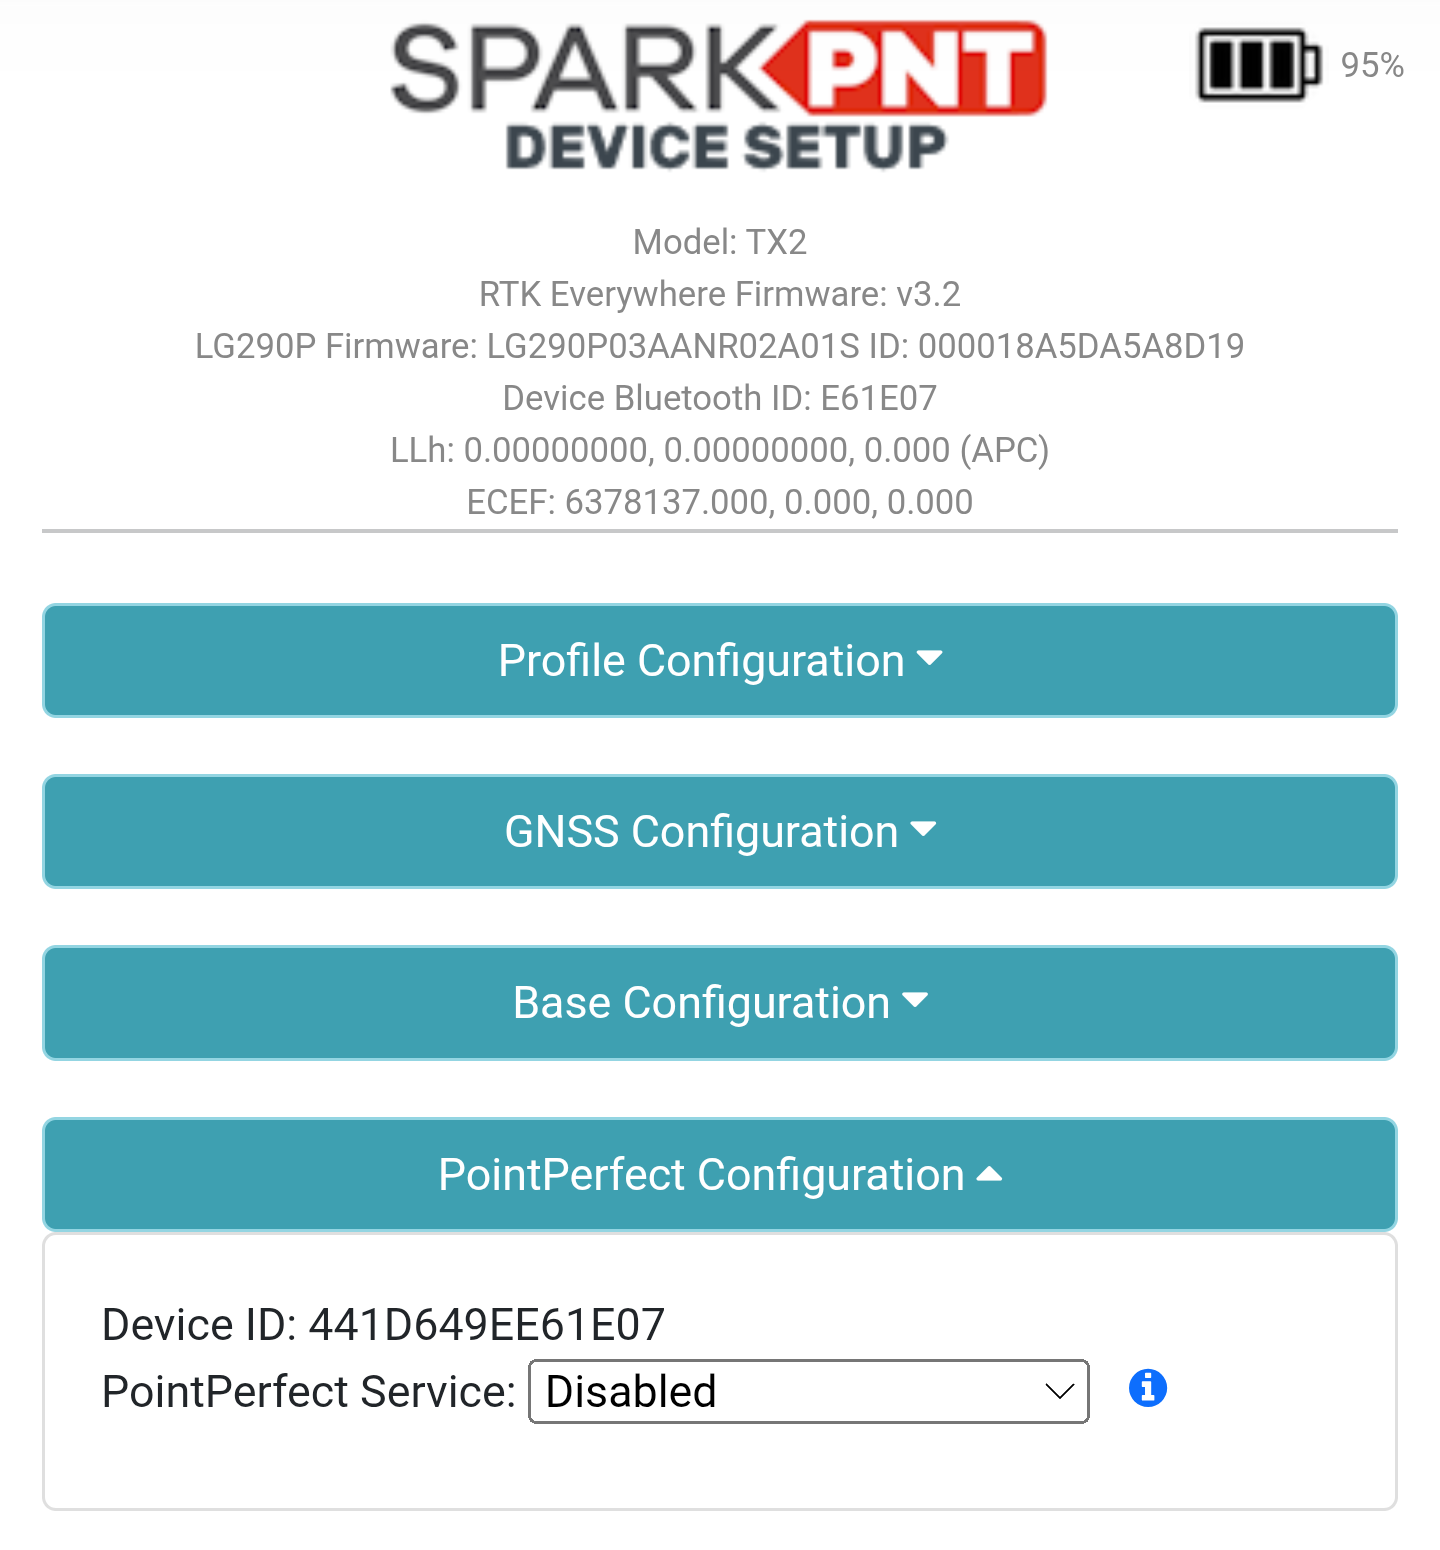
Point Perfect Configuration menu.After the desired settings have been changed, scroll to the bottom of the configuration webpage and click the Save Configuration button. Once the Success : All Saved message appears, reload the webpage to update the configuration settings.
Data Ports
From the rtk.local configuration webpage, open the Ports Configuration drop-down menu. This allows users to enable and configure data outputs on the following ports. For the TX2, this is limited to the USB-C port.

Ports Configuration menu.After the desired settings have been changed, scroll to the bottom of the configuration webpage and click the Save Configuration button. Once the Success : All Saved message appears, reload the webpage to update the configuration settings.
WiFi Connection
From the rtk.local configuration webpage, open the WiFi Configuration drop-down menu. Here users can configure the WiFi setting of the device. The device has two operational modes:
- AP: The device provides a WiFi access point for other devices to connect to it. This is useful for configuring the device in remote locations, where a WiFi network is not available.
- WiFi: The device access the WiFi networks configured in its settings. This is useful for connecting to WiFi hotspots (provided by a cellular device) for NTRIP services; or using a local WiFi network to configure settings and/or update the firmware for theTX2.

WiFi Configuration menu.After the desired settings have been changed, scroll to the bottom of the configuration webpage and click the Save Configuration button. Once the Success : All Saved message appears, reload the webpage to update the configuration settings.
WiFi Mode
At the bottom of the WiFi Configuration menu, there are two WiFi modes the users can select:
AP: The device will broadcast an access point calledRTK Configthat allows users to access this configuration webpage.WiFi: The device will try to connect to the WiFi networks, configured in the settings of theWiFi Configurationmenu.- To reconfigure the device back into
APmode, users will need to connect to the same WiFi network as the device. Once connected, open a browser and users should be able to access thertk.localconfiguration webpage.
- To reconfigure the device back into
After the desired settings have been changed, scroll to the bottom of the configuration webpage and click the Save Configuration button. Once the Success : All Saved message appears, reload the webpage to update the configuration settings.
WiFi Networks
In the WiFi Configuration menu, users can save up to four WiFi network connections. Just select and enter/modify the credentials for each WiFi network.
The TX2 is only compatible with 2.4GHz WiFi networks, which have more range. It cannot connect to the higher bandwidth/speed 5GHz networks. This is a hard limitation of this device and is not upgradable through software or hardware.
For connections to Apple iOS devices, user will need to modify their hotspot settings.
Once the device has been reset, the device will beep. To allow the device to connect to a WiFi network, double click the power button. The status indicator will turn solid, once the WiFi connection has been established.
TCP/UDP Connection
From the rtk.local configuration webpage, open the TCP/UDP Configuration drop-down menu. This allows the device to access or provide corrections using either the TCP or UDP protocols.
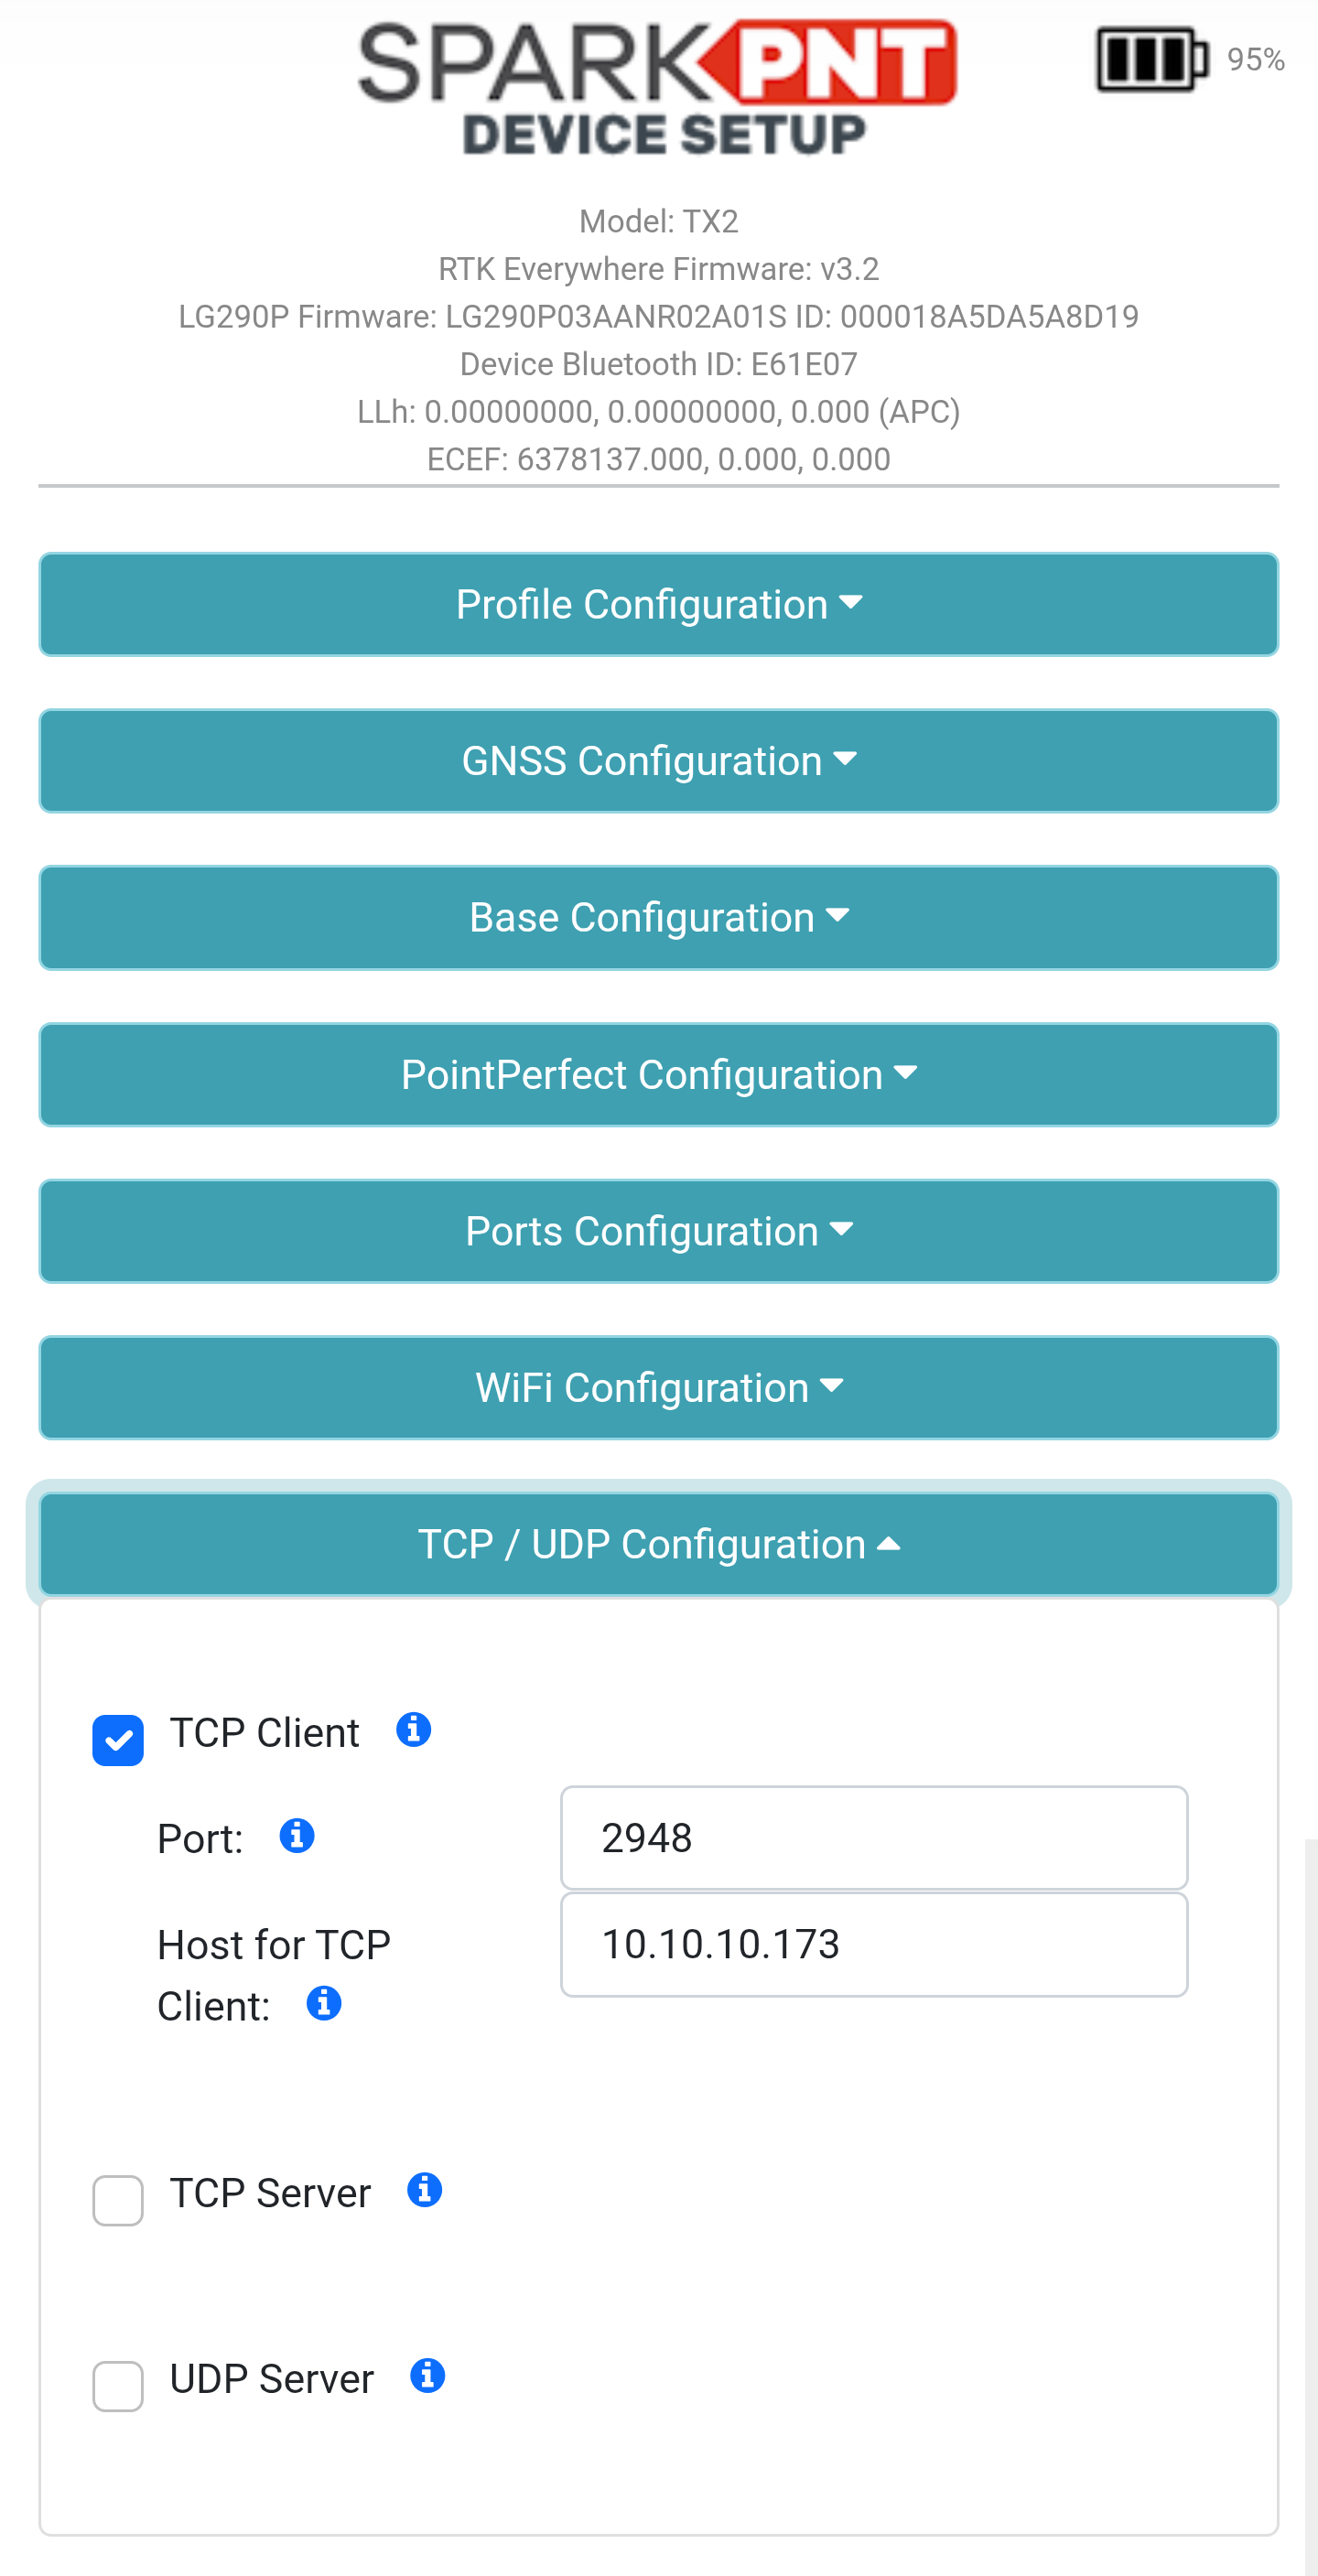
TCP/UDP Configuration menu.After the desired settings have been changed, scroll to the bottom of the configuration webpage and click the Save Configuration button. Once the Success : All Saved message appears, reload the webpage to update the configuration settings.
Radio Settings
From the rtk.local configuration webpage, open the Radio Configuration drop-down menu. This setting enables the device to either use the ESP32 or LoRa RF module to broadcast or receive for RTK corrections; including the device pairing configuration.

Radio Configuration menu.After the desired settings have been changed, scroll to the bottom of the configuration webpage and click the Save Configuration button. Once the Success : All Saved message appears, reload the webpage to update the configuration settings.
Correction Priorities
From the rtk.local configuration webpage, open the Corrections Configuration drop-down menu. Selecting any of the available options, will convert it to the first priority.

Corrections Configuration menu.After the desired settings have been changed, scroll to the bottom of the configuration webpage and click the Save Configuration button. Once the Success : All Saved message appears, reload the webpage to update the configuration settings.
Instrument Heights
From the rtk.local configuration webpage, open the Instrument Configuration drop-down menu. Here users can configure the APC (antenna phase center) and antenna height for the ARP (antenna reference point), so that measured positions are converted to reference the bottom of the survey pole.

Instrument Configuration menu.There are two provided measurements:
- APC (mm): This is provided by default for the device. However, users can modify this with calibrated measurements for increased accuracy.
- Antenna Height (m): This is provided by the user, to convert the measured positions to reference the bottom of a surveying pole. The measurement should be provided in meters, with the length of the surveying pole from its bottom tip to the ARP (antenna reference point) of the mounted device.
After the desired settings have been changed, scroll to the bottom of the configuration webpage and click the Save Configuration button. Once the Success : All Saved message appears, reload the webpage to update the configuration settings.
System Configuration
From the rtk.local configuration webpage, open the System Configuration drop-down menu. Here, users can access the devices system settings to upload new firmware, check and update the firmware through a WiFi network, configure its operating modes, the Bluetooth settings, buzzer, units of measurement, and factory reset.

System Configuration menu.After the desired settings have been changed, scroll to the bottom of the configuration webpage and click the Save Configuration button. Once the Success : All Saved message appears, reload the webpage to update the configuration settings.
Firmware Update
There are two methods for updating the device's firmware.
- The over-the-air method, relies on an internet connection from a WiFi network to check for available updates and download them.
- The WiFi method, is for manually uploading the firmware file from a mobile device. The method relies on the RTK device to be configured as a WiFi access point for the mobile device to connect to it.
Factory Reset
Select the Enable Factory Default option; then click on the Reset to Factory Default button.
A Defaults Applied. Please wait for device reset... message will appear next to the button. The device will beep once, after it has reset. To access the configuration settings again, users will need to reconnect to the device as an access point (its default setting).